Tuesday, June 27, 2017

Ice Candy/Freezie Holder


In the Philippines, it is called Ice Candy or Ice Pop. In other countries, it is also called Freezie. But whatever it is called, it is sure a treat to everyone, most of all for the kids.

Here in the Philippines summer almost never ends. Although this month the rainy season starts, it still gets hot sometimes. So on a hot day, an Ice Candy surely is in demand for my kids. But it can get messy and they often ask for a hand towel to hold the Ice Candy to protect their little fingers from the cold. So I got the idea of making a holder for them. They did love it and was so happy that it is not that messy anymore and they can hold the Ice Candy for long without their hands getting numb. But most of all they all love it.

Materials
  • Red Heart Super Saver
  • G/4.00mm Crochet Hook
  • Tapestry needle
  • Stitch Markers
  • Scissors
Stitches Used
  • ch - chain
  • sc - single crochet
  • sl st - slip stitch

Skill Level - Beginner

Instructions

Round 1.  Magic Ring, 6 SC into the ring. Do not join continue to work in rounds. You can now use your stitch marker to mark as you go.  If you want it to be in many colors you can change as you go. 6 SC

Round 2.  2 SC in each stitch around. 12 SC

Round 3.  SC in the first stitch, 2 SC in next. Repeat all around. 12 SC

Round 4-24. SC in each stitch. 18 SC

Fasten off and weave all ends.

That's how easy it is. A good stash buster and a good project also to practice your skill if you are only starting to learn crochet. 

Here are some pictures of the kids enjoying a hot day with an Ice Candy. They sure love to pose for pictures.


Don't forget to Tag me on Instagram and Twitter with your finished project and also like my Page in Facebook, Si Nanay Madel. I would love to see what you've done and Pin it also on Pinterest.
So that's it. I hope you all learn something and enjoy this post. If you have any questions, comments or suggestion just leave a message in the comment box and I will gladly answer them. Thank you and God bless!

xoxo


Nanay Madel


Don't forget to share on Facebook, Pinterest, Twitter and more.  
**Please do not copy and post any pattern from this blog and claim it as your own. This pattern is limited to personal use only.  Please do not re-publish all photos from this blog as your own. You may make and sell products from my pattern. Please also link back to my post. Any link back will be much, much appreciated. Thank you very much. **
I always make sure to share also because I learn to crochet for free from some very generous bloggers. So please also click the links and support the bloggers.

Thought of the Day

June 26, 2017

God does not ask us to do in our own strength the work before us. He has provided divine assistance for all the emergencies. - T8 19

Thursday, June 22, 2017

Violet Baby Shoes

It's finally done! I've been dying to finished this pattern for everyone. I love making baby shoes but have stopped though because no one is using my baby shoes, for my kids have all grown up and are no longer babies but they will always be my "babies". Then my sister gave birth to a beautiful baby girl last February and here I am again making beautiful crochet things for our newest bundle of joy.

Yes I know she was born in February and it's already the end of June, and I just posted this pattern today. It's because we've been so busy, from the closing of classes (March in the Philippines), to super full of activities in the summer (April-May) and the opening of classes (June). And in between those months, we've moved to our new home. It's not done yet but it is our own now. We've been staying at our Aunt's house for the past 7 years and finally, we have a home to call our own.

So that is why this pattern is so past overdue. I wish this coming month I'll be able to crochet more and share more.


So I hope you all enjoyed this pattern for  Violet Baby Shoes! It is already available in my Ravelry Store for downloads.   If you have any questions about this pattern feel free to email me at sinanaymadel@gmail.com or visit my blog http://sinanaymadel.blogspot.com


All patterns written in standard US terms.
PATTERN ONLY - Not finished product.
Must be familiar with basic crochet stitches and techniques.
Directions are written so that they are easy to read and follow.
Materials, Gauge, and Stitches Used are also indicated in the Pattern.
Includes "How To" photos


Difficulty Level: Easy to Intermediate

INSTANT download

***You can always contact me if you have any problems with the pattern. I am happy to help if you have any questions along the way.
Please be respectful and do not sell or distribute this pattern in any way, especially as your own.
This pattern is intended for personal use, it may not be distributed in any form. You are welcome to sell the finished product that is made using this pattern.

Text and images Copyright ©2017 by Si Nanay Madel, all rights reserved. No pattern may be reproduced or distributed — mechanically, electronically, or by any other means, without written permission. 


xoxo


Nanay Madel


Don't forget to share on Facebook, Pinterest , Twitter and more.  
**Please do not copy and post any pattern from this blog and claim it as your own. This pattern is limited to personal use only.  Please do not re-publish all photos from this blog as your own. You may make and sell products from my pattern. Please also link back to my post. Any link back will be much, much appreciated. Thank you very much. **
I always make sure to share also because I learn to crochet for free from some very generous bloggers. So please also click the links and support the bloggers.


Thought of the Day

June 22, 2017

The Holy Spirit exalts and glorifies the Saviour. - CE 59

Tuesday, June 20, 2017

Crochet V-stitch Bag


At long last, my bag is finished. This took a while to finish because I got tangled with other crochet project and I kept forgetting that this bag needs to be done also. And I procrastinate so much on sewing the lining. Tip: This bag really needs to be lined. So prepare your cloth for lining and prepare yourself in some hand sewing.

Materials:
  • Red Heart Super Saver ( White and  Blue)
  • H/5.0mm  Crochet Hook
  • Tapestry Needle
  • Stitch Markers
  • Cloth for lining
  • Needle and Thread for Sewing

Size:


Stitches Used:
  • CH(s) - chain (s)
  • SC - single crochet
  • HDC - half double crochet
  • DC - double crochet
  • SL ST - slip stitch
  • SC Dec - single crochet decrease

Instructions:

Row 1. CH 41, HDC in the 2nd chain from the hook, HDC in next 39 stitches. Ch 1 and turn (40 HDC)

Row 2-4. HDC in each 40 stitches. CH 1 and turn. (40 HDC)

After  Row 4 we will continue working in ROUNDS this time.

Round 1. HDC in the side of the last HDC you just made. HDC in each side of row 3, 2, and 1 until you reached the other side of the foundation CH and start crocheting each stitch with HDC. Continue until on the other side of the rows.  Join with an SL ST in first st of Row 4. (88 HDC)

Round 2. CH 1, HDC in each stitch around (88 HDC).

Round 3. CH 2, DC in the first stitch, *skip 1 stitch then 2 DC in next*. Repeat this pattern all the way around (44 v-stitches)

Round 4. CH 2, DC in first st, * 2 DC in between the 2 DC of previous round* Repeat all the way around (44 v-stitches)

Round 5-22.  Repeat Round 4.  Fasten off and weave all ends.

Let's start making the handle. 

Round/ Row 23.  Count 10 v-stitch then start making a v-stitch (2 DC) in the 10th v-stitch. Make 22 v-stitches across, change color, CH 2 and turn.
     *Update: Count 10 v-stitch from the beginning of your last round, attached your yarn and start making a v-stitch(2dc) in the 10th v-stitch. Make 22 v-stitches across, change color, CH2 and turn.

Round/Row 24. Slip stitch in between the last v-stitch of the previous row. CH 2, v-stitch in the next v-stitch until the 2nd to the last v-stitch. In the last v-stitch just do 1 DC. change color, CH 2 and turn ( 20 v-stitch and 1 DC/CH2 in each end.)

Row 25 - 27. Repeat Row 24 until you end up with only 14 v-stitches and 1 DC/starting CH2 in each end of the row.

Row 28-38.  CH 2, v-stitch in first v-stitch until the end. DC on top of  CH2  of the previous round.  CH2 and turn. DO NOT CHANGE COLOR (this rows should be all white.) 14 v-stitches, 1 DC/CH2) in each end of the row. You can continue to work more if you want your bag to be longer.

Row 39. CH 1, SC Dec, SC in each 26 stitches, SC dec in the last stitch.  28 SC.

Row 40. CH 1, SC Dec, SC in each  24 stitches, SC dec in last stitch  26 SC

Row 41. CH 1, SC Dec, SC in each  22 stitches, SC dec in the last stitch.  24 SC

Row 42. CH 1, SC Dec, SC in each 20 stitches, SC dec in the last stitch.  22 SC

Row 43. CH 1, SC Dec, SC in each  18 stitches, SC dec in the last stitch.  20 SC

Row 44. CH 1, SC in the first stitch and in all stitches across. 20 SC

Row 45-? Repeat row 44 until your desired length.

Do this pattern also on the other side of the bag. Except in Row 23, you don't need to count 10 v-stitches anymore. Just continue to work on the next free stitches.

Join the two ends of the handle by either whip stitch or single crocheting them both.


For the Blue Cover on the handle.

Row 1. CH 23, sc in the 2nd chain from the hook. SC in all stitches across. Chain 1 and turn. 22 SC

Row 2-25.  SC across. Chain 1 and turn. 22. SC

Cover the joining in the handle with this piece by also sewing with a whip stitch or single crocheting them both.

*Update: SC evenly on the opening of the bag. Fasten off and weave all ends.

It's really good to line your bag. It adds more stability and protects your crocheted bag also. So line your bag and you are good to go.

And your bag is done. I hope you enjoy making this one


Don't forget to Tag me on Instagram and Twitter with your finished project and also like my Page in Facebook, Si Nanay Madel. I would love to see what you've done and Pin it also on Pinterest.
So that's it. I hope you all learn something and enjoy this post. If you have any questions, comments or suggestion just leave a message in the comment box and I will gladly answer them. Thank you and God bless!

xoxo


Nanay Madel


Don't forget to share on Facebook, Pinterest, Twitter and more.  
**Please do not copy and post any pattern from this blog and claim it as your own. This pattern is limited to personal use only.  Please do not re-publish all photos from this blog as your own. You may make and sell products from my pattern. Please also link back to my post. Any link back will be much, much appreciated. Thank you very much. **
I always make sure to share also because I learn to crochet for free from some very generous bloggers. So please also click the links and support the bloggers.


Thought of the Day

June 19, 2017

Prayer does not bring God down to us but brings us up to Him. - STC 93


Wednesday, June 7, 2017

Bella Backpack

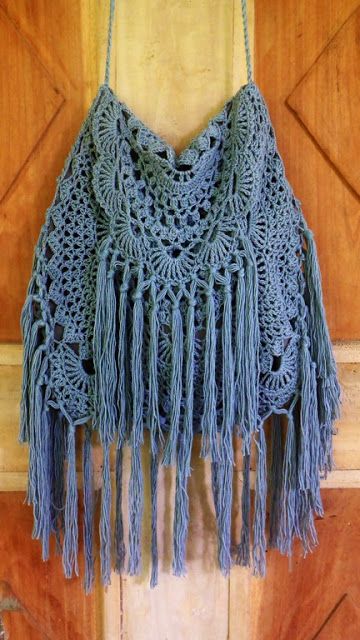
I made this bag for my niece. She is mostly the model of my creation and I wanted to make a bag for her. When I gave it to her, she said it looks like Dora's Backpack. I did not realize that it did look like Dora's backpack, I did not intend it to be like that. But I am happy as well that she liked it. My son likes it too, but he already has a backpack of his own.

So here are the details and the pattern of the bag. I hope you will all love this.

Materials:
  • Red Heart With Love - Bluebell
  • Lily Sugar and Cream - White & Yellow
  • H/5.0mm Crochet hook
  • Tapestry Needle
  • Scissors


Stitches Used
  • sc - single crochet
  • hdc - half double crochet
  • dc - double crochet
  • sl st - slip stitch
  • sc dec - single crochet decrease


Instructions

Bottom of the bag (make 2)

Round 1. Magic ring. 6 SC in the ring. Join and chain 1 (6SC)

Round 2. 2 SC in the first stitch and in all the next stitches.  Join and chain 1 (12SC)

Round 3. SC in the first stitch, 2 SC in next.  *SC in the next stitch 2 SC in next.* Repeat till end. Join and chain 1 ( 18SC)

Round 4. SC in the first stitch and in next stitch, 2 SC in next. *  SC in the next 2 stitches, 2 SC in next.* Repeat till end. Join and chain 1 (24SC)

Round 5. SC in the first stitch and in next 2 stitches, 2 SC in next. * SC in next 3 stitches, 2 SC in next.* Repeat till end. Join and chain 1 (30SC)

Round 6. SC in the first stitch and in next 3 stitches, 2 SC in next. * SC in next 4 stitches, 2 SC in next.* Repeat till end. Join and chain 1 (36SC)

Round 7. SC in the first stitch and in next 4 stitches, 2 SC in next. * SC in next 5 stitches, 2 SC in next.* Repeat till end. Join and chain 1 (42SC)

Round 8. SC in the first stitch and in next 5 stitches, 2 SC in next. * SC in next 6 stitches, 2 SC in next.* Repeat till end. Join and chain 1 (48SC)

Round 9. SC in the first stitch and in next 6 stitches, 2 SC in next. * SC in next 7 stitches, 2 SC in next.* Repeat till end. Join and chain 1 (54SC)

Round 10. SC in the first stitch and in next 7 stitches, 2 SC in next. * SC in next 8 stitches, 2 SC in next.* Repeat till end. Join and chain 1 (60SC)

Round 11. SC in the first stitch and in next 8 stitches, 2 SC in next. * SC in next 9 stitches, 2 SC in next.* Repeat till end. Join and chain 1 (66SC)

Round 12. SC in the first stitch and in next 9 stitches, 2 SC in next. * SC in next 10 stitches, 2 SC in next.* Repeat till end. Join and chain 1 (72SC)

Round 13. SC in the first stitch and in next 10 stitches, 2 SC in next. * SC in next 11 stitches, 2 SC in next.* Repeat till end. Join and chain 1 (78SC)

Round 14. SC in the first stitch and in next 11 stitches, 2 SC in next. * SC in next 12 stitches, 2 SC in next.* Repeat till end. Join and chain 1 (84SC)

Round 15. SC in the first stitch and in next 12 stitches, 2 SC in next. * SC in next 13 stitches, 2 SC in next.* Repeat till end. Join and chain 1 (90SC)


Round 16. SC in the first stitch and in next 13 stitches, 2 SC in next. * SC in next 14 stitches, 2 SC in next.* Repeat till end. Join and chain 1 (96SC)

After you made the first circle, fasten off and weave all ends. But in the second circle do not fasten off.

Round 17. Join the two circle together by single crocheting each stitches both together and this will be Round 17. Join and chain 1 (96SC)

Round 18. SC in each stitch around. Join and chain 1 (96SC)

Round 19 to 52.  SC in each stitch around. Join and chain 1( 96 SC)

Round 53.  SC in the first stitch and in next 2 stitches, chain 1 and skip one stitch. *SC in next 7 stitches, chain 1, skip 1 stitch.*  Repeat until the end and you will end up with only 4 stitches in the end. Join and chain1. (84 SC, 12 chain1 and skip stitches)

Round 54.  SC in the first stitch and in next 2 stitches. 2 SC in chain 1 space. SC in each next stitches and 2 SC in each chain 1 spaces. Join and chain 1  (108 SC)

Round 55-56. SC in each stitch around. Join and chain 1. (108SC)


Bag flip

Row 1. Chain 21 SC in the 2nd chain from the hook. SC in each stitch till the end. Chain1 and turn. ( 20 SC)

Row 2-22. SC in each stitch of the row. Chain 1 and turn (20SC)

Row 23. SC Dec in first 2 stitches, SC in each of the next 16 stitches, SC dec in the last two. Chain 1 and turn ( 18SC)

Row 24. SC Dec in first 2 stitches, SC in each of the next 16 stitches, SC dec in the last two. Chain 1 and turn ( 16SC)

Row 25.  SC Dec in first 2 stitches, SC in each of the next 16 stitches, SC dec in the last two. Chain 1 and turn ( 14SC)

Row 26. SC Dec in first 2 stitches, SC in each of the next 16 stitches, SC dec in the last two. Chain 1 and turn ( 12SC)

Row 27. SC Dec in first 2 stitches, SC in each of the next 16 stitches, SC dec in the last two. Chain 1 and turn ( 10SC)

Row 28. SC Dec in first 2 stitches, SC in each of the next 16 stitches, SC dec in the last two. Chain 1 and turn ( 8SC)

Row 29. SC Dec in first 2 stitches, SC in each of the next 16 stitches, SC dec in the last two. Continue to SC in each stitch on the side back to the starting chain and back to the other side. Join in the first stitch and fasten off. (82 SC)

Attached the flip at the back of your bag. Make sure to attach it to the center.

Strings for the closing of the bag.

Chain 111, slip stitch in the 2nd chair from the hook. Slip stitch all stitches. Fasten off and weave all ends. Insert string into the 12 holes. And cinched closed your bag.

Back strings/strips

Make 4 strips. Refer to the diagram below on where to attach.
Row 1. Chain 4, SC in 2nd chain from hook, SC each stitch. Chain 1 and turn  (3SC)

Row 2 – 5.  SC in the first stitch and in all stitches. Chain 1 and turn. (3SC)


The small red boxes are the strips we just made. There were no specifications on where I put this strips. I just put them like that at the back of the bag. Sewing their ends on the bag making a small opening in the center for the strips to go in.

Straps/Strips.

Chain111, do not fasten off yet. Insert the chains you just made the right side set of strips. Both on the upper strip and the lower strip, then without twisting your chains join in the first chain to form a circle.  Make another string and do the same on the other side.

Alternative Backpack Straps/Strips (make 2)

Row 1. Chain 6, SC in the 2nd chain from the hook. Chain 1 and turn. (5SC)

Row 2-60 (Row 60 should be enough but it is still up to you on how long you want the straps). SC in the first stitch and in all stitches. Chain 1 and turn (5SC)

Attach your straps to the back of the bag by sewing each end into the bag. Positioning them like in the diagram below. The red dots marks where you should sew.

 
Please excuse my diagrams, I am not really good at it. I hope you can understand what I am trying to say.


And as for the flower, I used Repeat Crafter Me's Free Pattern.


If you want a ready to download pattern in PDF form for this bag, it is on my Ravelry Store and you would have to pay just $1.00 for it, here


Don't forget to Tag me on Instagram and Twitter with your finished project and also like my Page on Facebook, Si Nanay Madel. I would love to see what you've done and Pin it also on Pinterest.
So that's it. I hope you all learn something and enjoy this post. If you have any questions, comments or suggestion just leave a message in the comment box and I will gladly answer them. Thank you and God bless!

xoxo


Nanay Madel


Don't forget to share on Facebook, Pinterest, Twitter and more.  
**Please do not copy and post any pattern from this blog and claim it as your own. Please do not re-publish all photos from this blog as your own. You may make and sell products from my pattern. Please also link back to my post. Any link back will be much, much appreciated. Thank you very much. **
I always make sure to share also because I learn to crochet for free from some very generous bloggers. So please also click the links and support the bloggers.


Thursday, June 1, 2017

FREE CROCHET PATTERN: Boho/Hippie Bag


So many beautiful bags in the internet these days. But boho/hippie style bags always catch my eye. These are some of the bags around the web that the patterns are for free as of writing. All the designs are awesome and hope you will also try to make one. I  will try to make one also. 


  1. The Mykonos Bag by Sewrella  
  2. Ala Miss June Dessert Bag by Crochetology - This one is not really a free pattern but by the way she describe every detail of her bag you can actually get the idea of how it was done. So I included this one here because I like it. 
  3. Crochet Purse at free-crochet.com You need to be a member to download this pattern. But it's easy to be a member, no need of credit cards or anything. It's absolutely  free. 


So I hope you will try some of the bags and enjoy while making them. 

All of the pictures here are not mine. Credit all to the bloggers and designers.

xoxo


Nanay Madel


Don't forget to share on facebook, pinterest , twitter and more.  
**Please do not copy and post any pattern from this blog and claim it as your own. Please do not re-publish all photos from this blog as your own. You may make and sell products from my pattern. Please also link back to my post. Any link back will be much, much appreciated. Thank you very much. **
I always make sure to share also because I learn crochet for free from some very generous bloggers. So please also click the links and support the bloggers.


Thought of the Day

June 1, 2017

To learn and to do the works of Christ, is to obtain a true education. - FE 392